Development

Using the base mesh I created the second time, though broken down sections, like the ear and what would be the mouth already attached.
The ear was a major obstacle but by building it separately and attached with a sufficient even poly flow throughout the entire head.
Heads are no way symmetrical though like the ears, these were mirrored but only then reshaped to match the reference photos. Half of the face was mirrored to only then reshape from the reference photos used.


I wanted to go further with head and experimented with the hair/fur modifier whether it was worth pursing later the development. Though the hair would be mapped out from the texture projection but thought to push it anyway. Regardless how it would come cause then if I knew it wasn’t to go into the final render, at least I had a go with it.

The modifier was completely knew to me but something to consider when doing creatures or other characters in the future.
Apart from the ear, the nose was also difficult by not the size but the way it was angled and the photos muddled my perception from one angle to the other. It thought it was best to get the correct topology done before heading into ZBrush for the sculpting.
The original idea panned to do both the sculpting and texturing within ZBrush as more options and tools were more diverse than it was with Mudbox. However this would anticipated if there was anything to go wrong to switch to Mudbox if need be.
From division one to eventually subdivision six, the details was building up bit by bit. Like the previous attempt was to leave the set of eyes out as a separate object, as work on the eyes themselves would be a mix composition of the photo but also improvisations within Photoshop.

More work went into the strains of hair from the head towards down to the beard.
As anticipated the problem arises when the “applink” to assist the texturing side was buggering up the version ZBrush the computer was running. Mudbox was to lead to the texturing side and ZBrush finished. Importing to Mudbox did have its faults. This image was subdivided six times to make up around seven million pixols which is smooth running but once exported to Mudbox, I could only reach 10-12 fps. As this was only the texturing side, the subdivision 5 mesh would be used for the poly projection. Instead of projecting the entirety of the reference on to the mesh to only muddle the rest of the texture. Only a small section would be painted though this was patchy work and heavy clean up would be needed in post-production.


The clone tool and patch tool played a major part in fixing the errors and lots of colour correction to get to a satisfactory state. For the face alone, a diffuse map, spec and normal on both the face and the eyes were originally 4k resolution. Diffuse, Spec and normal on the face were reduced to 2048*2048. The eyes dropped to 256*256. The helmet dropped to 1024*1024.

Retopology was considered but dropped the idea as the ZBrush subdivision 1 mesh changed so much compared to the low poly on the far left of the image above. The subdivided model hovered around the 26,000 poly mark which was more than efficient for head. Admit tingly, edge loops could have been removed to optimize the mesh a bit more.


By creating a series of planes around the areas of the face to only to be “object painted” along the mesh made work less time consuming. Though I did not finish in texturing all of the planes, it certainly slowed the machine even though the it was only a few thousand polys.
This would be something to add on for the final render in the future.
The head itself was pretty much done and was ready to render within Max, though I thought to tryout the new version of Marmoset to render out the beauty shots there. A software package already installed since launch but never knew how to work with it. After some brief start up guides. I’m really impressed with real time shaders the package offers and insist to use it in future work.
The helmet was the same as before but was reshaped from the new head this time and textured to have some wear and tear.

Conclusions
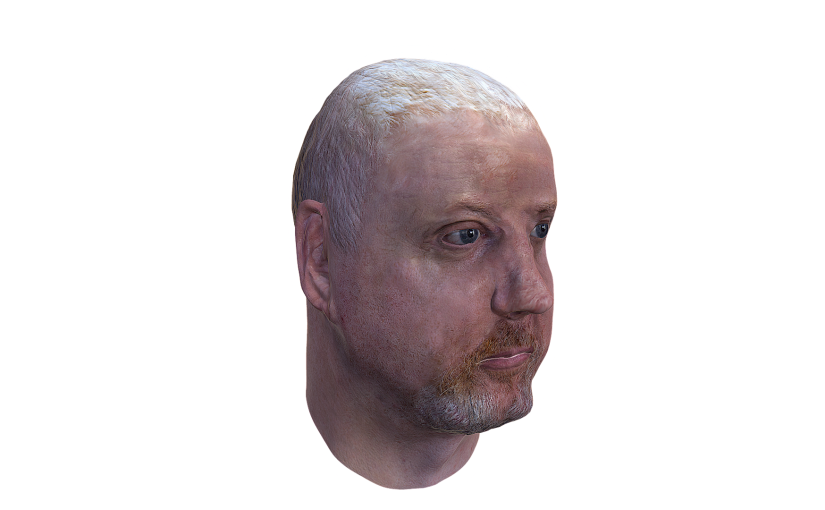
The head specifically has improved in terms of quality and accurate around some angles but the front of face was difficult in interprete as I knew changing would change the rest of the look of the face.
The refernces of photos were great to use though even with the final renders, there is still a few patches from the hairline visible. But nonetheless, this is something to learn from in the future.
Improvements
I think the helmet does let it down somewhat but better than it was in previous attempts as the empty spaces in bewteen the faces was reduced as much as possible.
I’m happy how the renders came out from Marmoset and tend to use more of it in the future, I.e Masters Project & professional work.
After this project, more attempts in character modelling with photo reference can only help me to practice more and become more efficient at it.


