Progress…

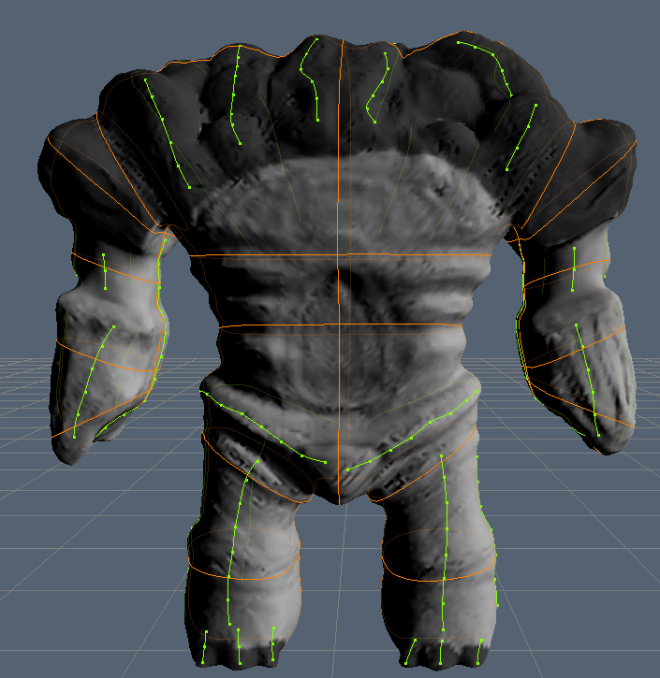
Because of the unforeseeable future (*cough GTA 5), I am still to pursue with the unwrapping and normal mapping. However, I am going to leave the texturing part for the time being and head straight to the animation process before the 20th. This project is to enhance my animation ability, that of course my texturing though the priority is the animation.

Having said that, further work to my colour theory still needed to provide a better understanding for the task at hand over the weekend.

The issue I am struggling with is the unwrapping stage only because there are the divisions between the all the limbs are not consistent. Each limb and body will undergo separate unwrapping processes each under a 2048*2048 should suffice.

Retopology Completed

Retop Montage

The retopology process was not that bad this time round and did not take long as it usually does. 3D Coat is still my preferable choice for retopology, well for a rough auto retop anyway. Drawing every part of the edge flow for a natural polyflow seemed simple enough. The auto retop was only to give out a rough topology but if you draw enough edges on top of the mesh then forms more appropriately without too many hitches.

Initially I had the idea around 20k tris for the total count. This count was judge by current generations’ games, mainly for the leading characters. It is obvious it would be more for the next generation.

The finished retop ended being around the 21k mark: the eyes, additional loops around the eyes but also corrections with the silhouette errors in Max.

Body Edgeflow Hands Edgeflow Head Edgeflow

The limbs and head remain separate to the body as the density of polys differs from one to the next. To avoid textures looking completely different when the time comes, everything is to be as one complete asset, unwrapped as one in a 2048*2048 map.


Zbrush Completed

It has been a hectic week but retopology is in a working progress. For the time being, the works in the Zbrush area is finished.
The character is actually in three separate parts: head, body and hands. These three areas allowed me to focus explicitly where it would not be possible if it were all together. Each layer added one by one from the basic subdivision to the next adding more little details whilst preserving the previous details.

Note that not all the details was not from the concept because as there was not any to base it off. The details were simply a mix of imagination and research I have dwelled into a few weeks ago.

The Hand

Hand Montage

This creature hands remain a sausage like state, only because I want to retain that rigid state. The legs and hands limbs are mainly forms of movement and thus the hands would be a factor. By any means the damaged hands does shows its scars but as the head and bits of the body are the most prominent, whereby the some details are over sighted.

The Head

Head Montage

Like the rest of the creature, this will no longer be symmetrical but very much asymmetrical. The jaw line is especially worth noting with details of pebble like stones as cheeks and chin. This detail spreads out towards what would be the throat/neck area. The teeth extracted from the original low poly will have no more additional detail. The eyes added during the retopology. The entire work is in a layer-by-layer basis like the rest from this development.

The Body

Body Montage

I should not have added geometry towards the low poly as I did because the details on the shoulder & back area are in Zbrush anyway. Nonetheless, I was able to spin it when using a variety of brushes to create different but modest realistic shapes similar from the final concept works I worked on. Adding bits of details in every layer would succumb to me to use a mix of stock brushes and alphas already to create the effect of chipped, ageing old stone but still looking organic in a way.

Completed Body

Complete Montage

Here is the final sculpt with everything together.

Progress 6.09.2013

It has been more than week since my last post however for good reason. Moving house is a stressful prospect and taking trip conferences (Was in London drafting this update) is taking more than enough time from doing my work. I am still heading for my 20th September deadline if it means late evenings to get this project finished.
The low poly is complete with a few additional loops to take on before moving to ZBrush. While in the background, I have researched colour theory and texture maps furthermore working out the UV mapping process for this creature as this would not be a symmetrical piece. I suppose the only change I have done is size dimensions during the concept phase. The adjusted side view now follows the rest of the silhouette.
Sketchfab is an awesome tool.

Low Poly Build.obj (click to view in 3D)

;

Low Poly Build.obj